Vectric Cut3D
27 Oct 2015Unfortunately I made the above mistake recently with Vectric Cut3D after a frustrating bout with another CAM application that I was struggling with. The Cut3D trial solved the particular problem I was having, so I bought it on a whim. Bad move.
Do not mistake the following guide/screenshots as any sort of intro or example. This is literally 'it'. There is no more to the following program than the following screenshots. If you want to cut wooden reliefs of pictures that your grandkids put on Twitter I suppose this is all you'll ever need, but if you need to anything else, ever, it's not going to be sufficient.
The software is effectively a bait to get you to buy their more expensive software after you find that the one you bought can't do some basic thing you need. Only difference in the bait/fish/fisherman dynamic is not only are you buying the bait in this example, but you're also the fish.
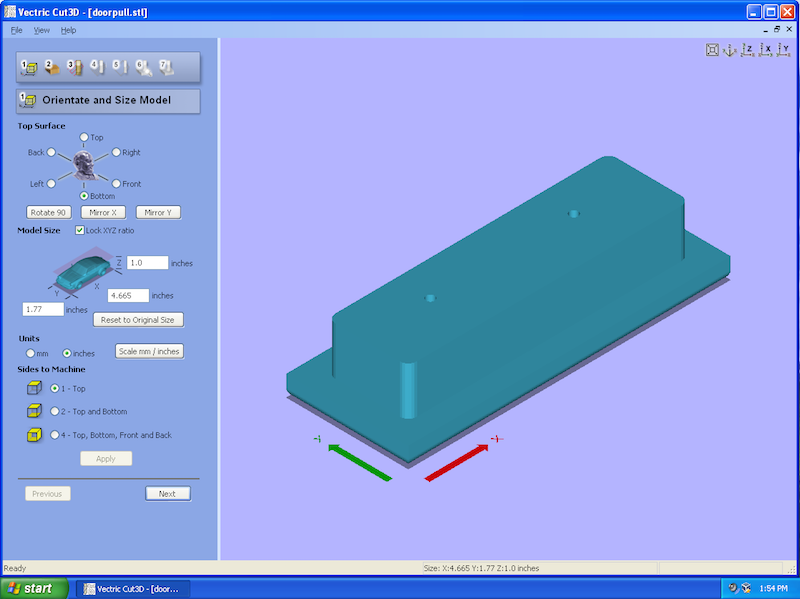
Here's our doorpull again, flipped upside down to do the simplest side first. Pretty standard fare for the beginning of a part cutting wizard. Define the top, units of measurement, scale, etc.
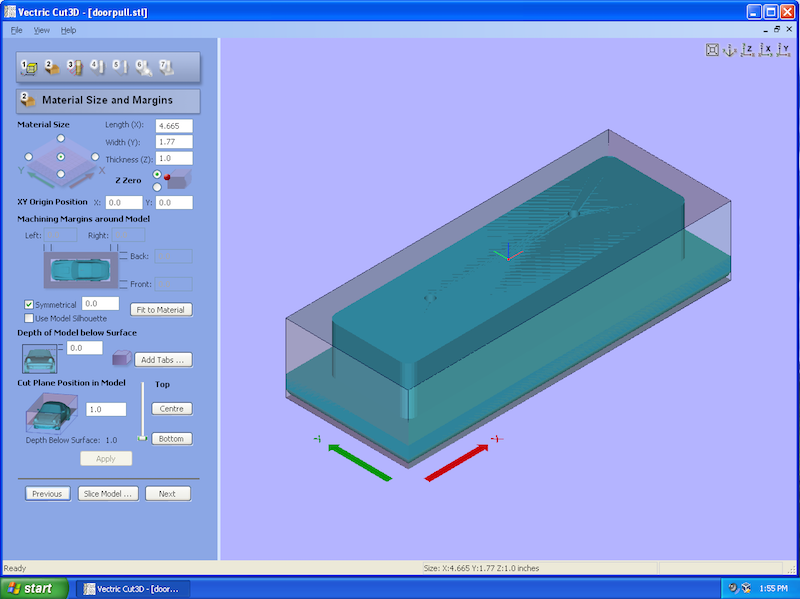
And here's step 2, aslo pretty easy going to this point. Define your stock size, part relative to the stock axis limits, whether you need tabs or not, and the Z zero point to start from.
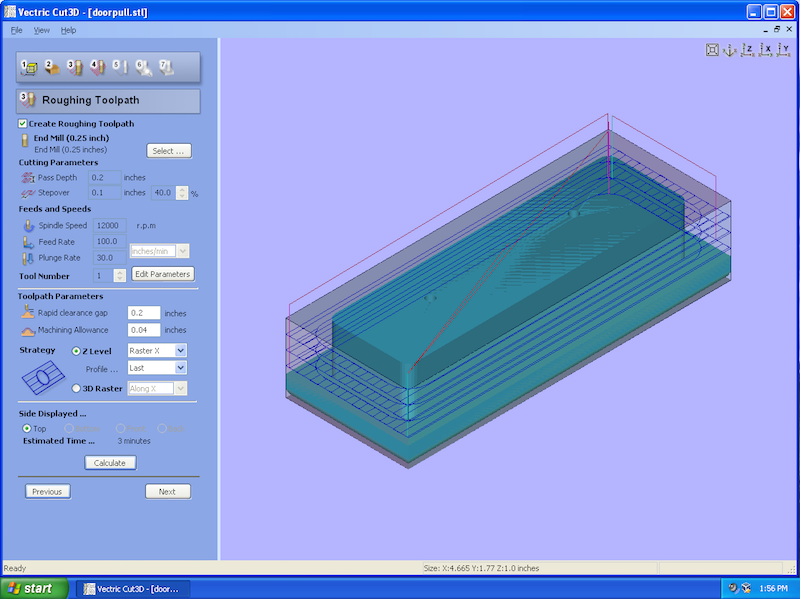
Now this is where things start to go terribly wrong. This is the roughing choices you have. Again, that's it, there are no other choices here. Rastering a 2d cut along x or y is either not going to give very good cut quality results, or take an abnormally long time with small stepover values. Either way, this isn't really sufficient in any way, shape, or form.
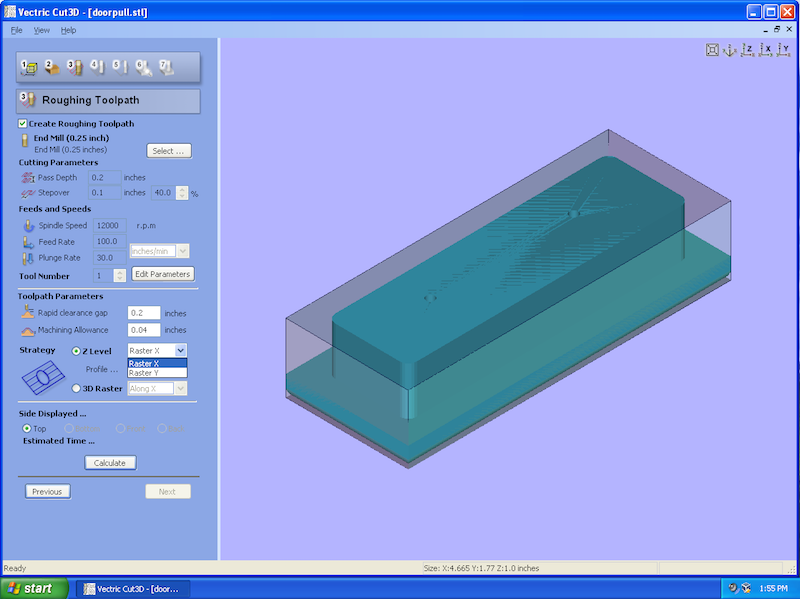
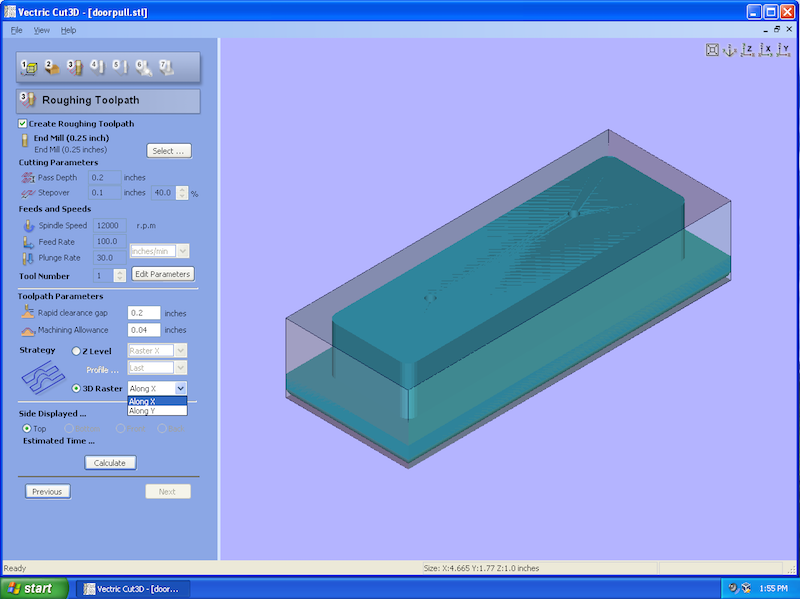
The only difference in 3D raster vs X/Y raster is it will follow the height of the object, you're still only cutting in one chosen direction. This will make for a very lengthy roughing toolpath that could be done as a contour of the object in a matter of seconds (or at least a couple of minutes, depending on your machine).
And here's what the generated toolpath will look like after you've made the choice from the limited set of options given above. In this example, X raster. For those just starting with this notice how the ends are being cut along the X axis, rather than making a single cut along the Y axis. Every one of those 'notches' in the end will be a 'notch' in your toolpath, very inefficient.
But lets not uninstall just yet. Maybe there's a way to overcome this with the finishing toolpath? Maybe we can water-line it at a deep stopping point, or define a pencil-type finishing toolpath to clean up the step marks on the ends?

Nope...we get the same choices as the roughing toolpath, a raster with the option for a 45 or 135 angle. That's it. So here's what that toolpath will look like, again lots of time and for little/no benefit on this sort of part.

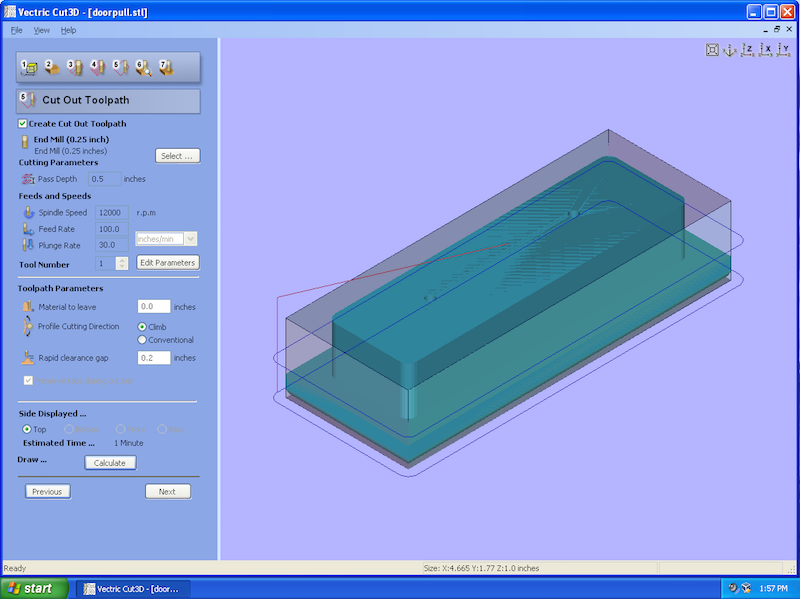
There is a 'cutout toolpath' option, but as you can see here it's limited to the outside diameter of the part. There's no way to trick it into doing a 2d contour cutpath, all it will do is cut around the outside diameter of the widest part of the object. Again, not very useful.
In short, don't impulse buy software, and surely don't impulse buy software from Vectric. You will be disappointed.
I'm not the only one finding this stuff out, apparently. The short answer is anything that costs less than Aspire from Vectric is going to be veeerrrrry limited, and will effectively accomplish nothing but leading you toward paying the 2 grand they want for Aspire.